This guide walks you through placing your first Latch on a Shopify product page — from creating a lock in the app to seeing it live on your storefront. No code required.
Navigate to the Control Center and create a lock
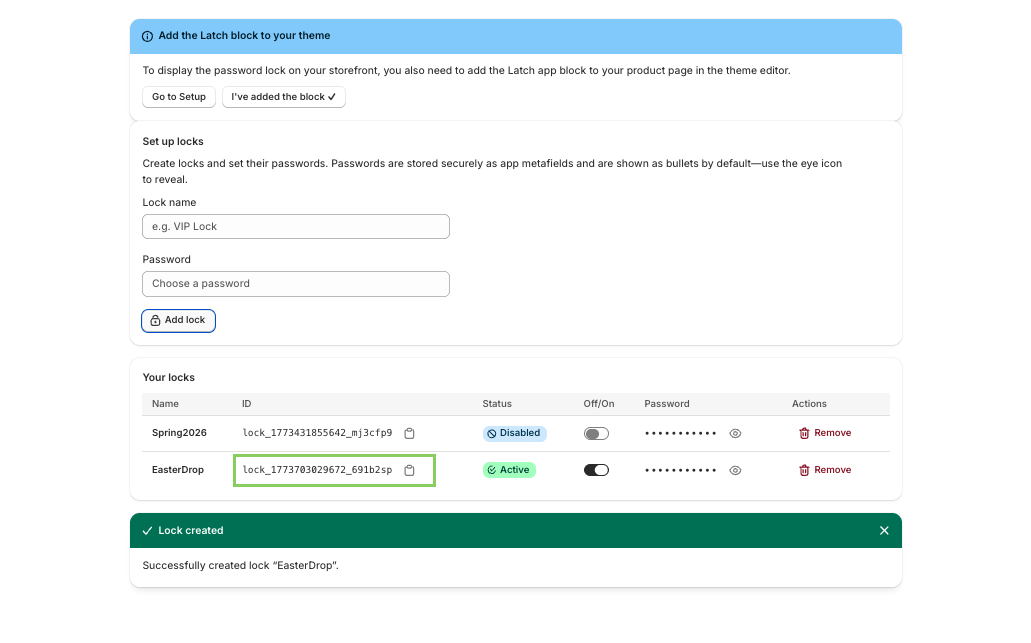
Open the Latch app from your Shopify admin and go to Control Center. Under Set up locks, enter a name for the lock (e.g. "VIP product info") and set a password that you'll share with the people you want to grant access to. When you're happy, click Add lock.
Copy the Lock ID
Once the lock is created it appears in the Your locks table. Find your new lock and click the copy icon next to its ID. Keep this handy — you'll paste it into the theme block in a moment.
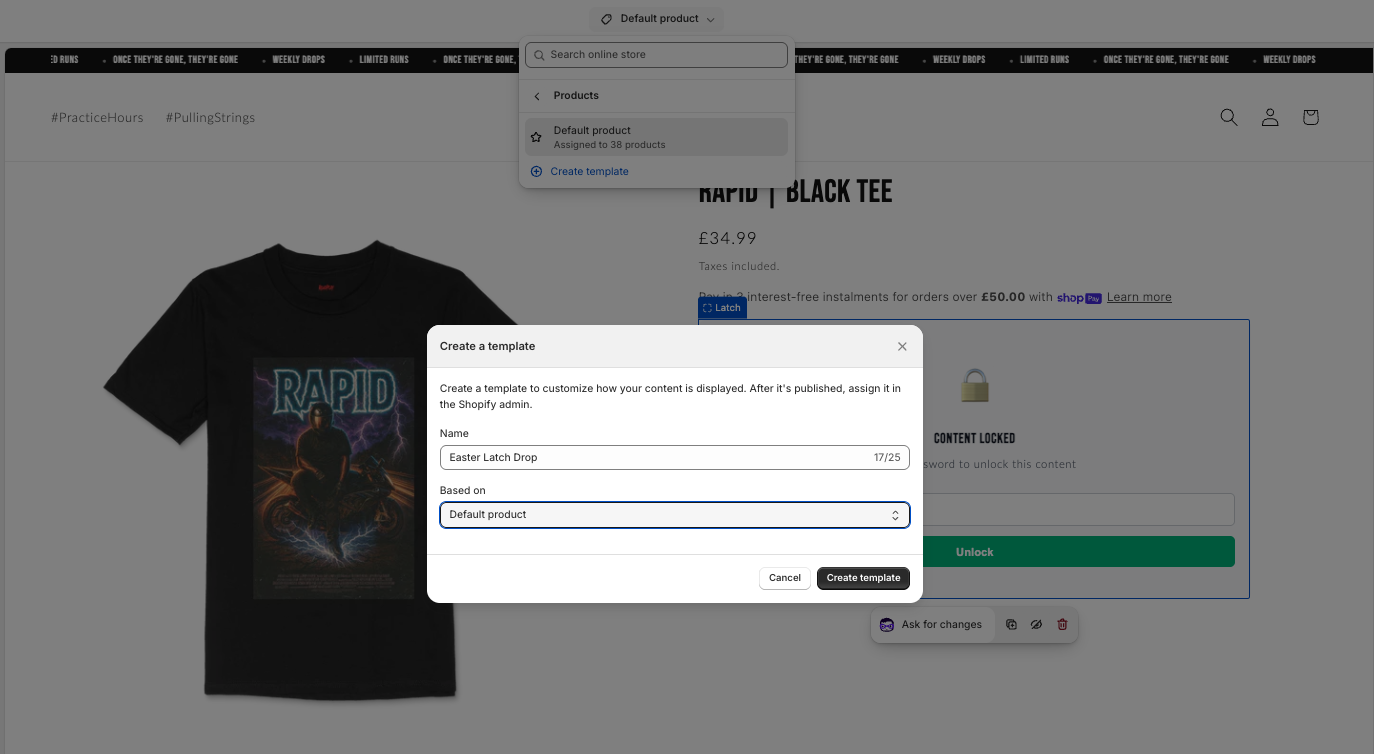
Open the theme editor and navigate to the right product template
In Shopify admin go to Online Store → Themes and click Customize. Use the template dropdown at the top of the editor to open a product template.
How Latch uses product templates: Latch locks content at the template level. Every product assigned to the same template will share the same password. This is great for grouping — for example, one "Wholesale" template for all trade products. For unique per-product passwords, create a separate template for each product. We are actively working on native per-product passwords and will share an update when ready.
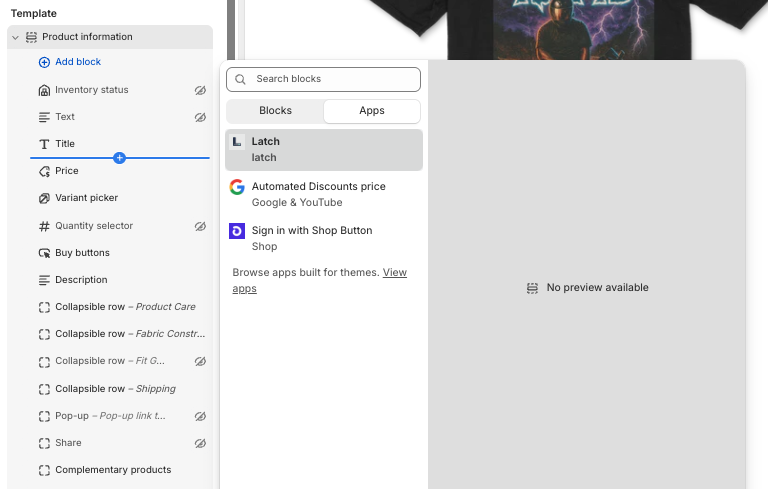
Add the Latch app block
In the left-hand sidebar, find the Product information (or main product) section and click Add block. Under Apps, select Latch.
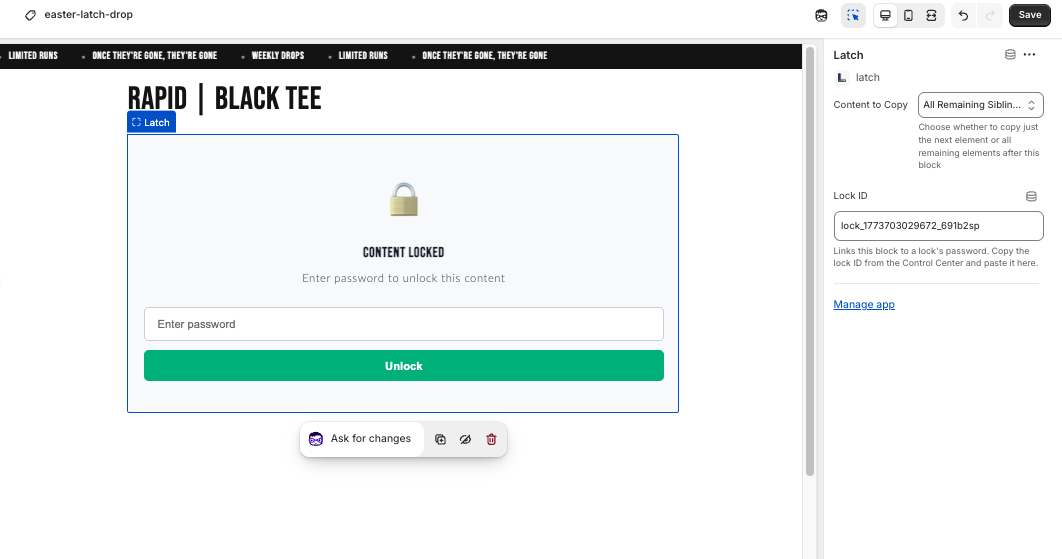
Place the block immediately above the content you want to gate. You can drag and reorder blocks in the sidebar to get it in the right position.
Choose what to lock: Content to Copy
With the Latch block selected, you'll see a Content to Copy setting. Choose the option that matches how much content you want to gate:
Paste the Lock ID into the block settings
Still in the block settings panel, find the Lock ID field and paste the ID you copied in step 2. The ID links the block on the storefront to the password you set in the Control Center — make sure it matches exactly.
Save
Click Save in the top-right corner of the theme editor. Your changes are now live.
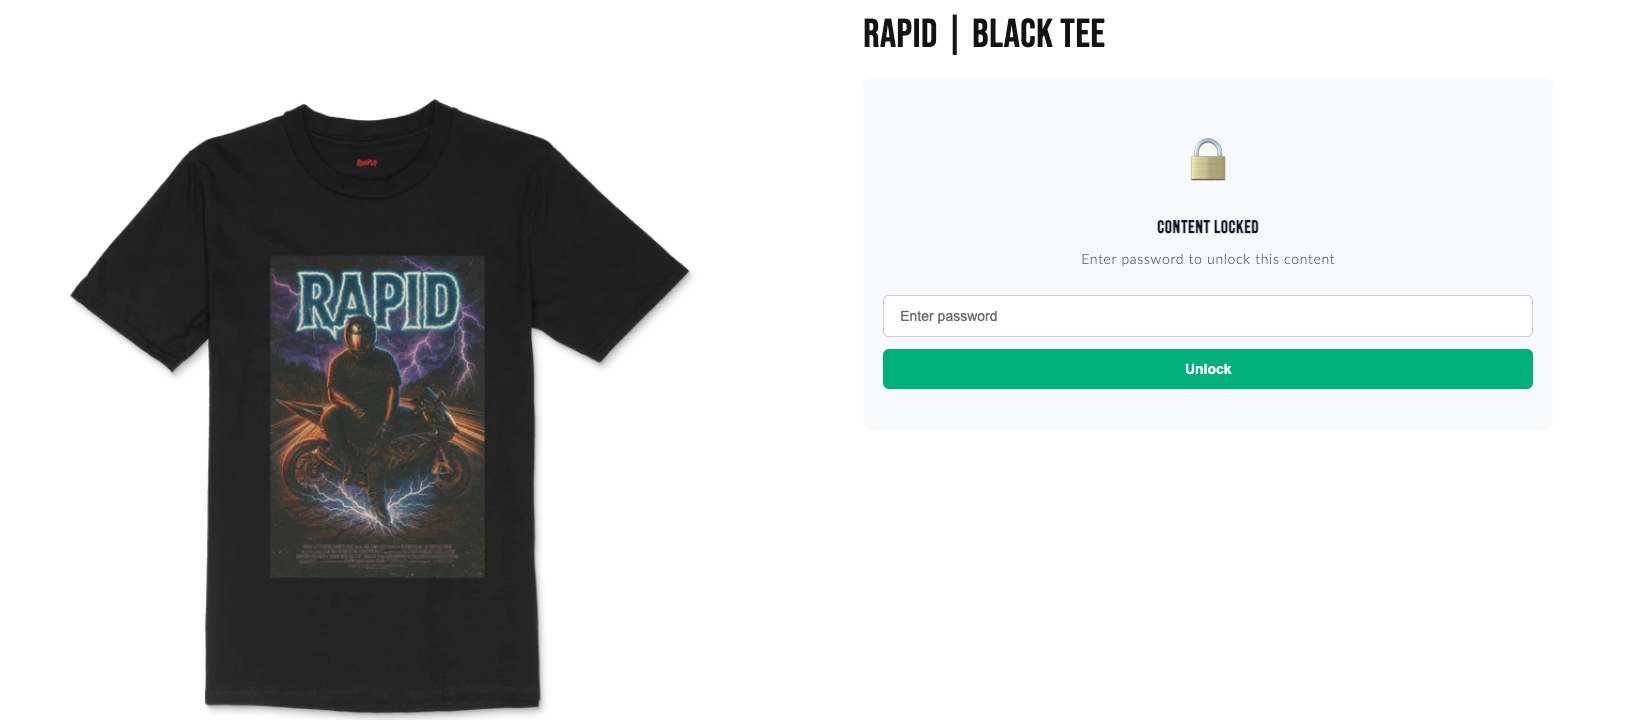
Use the Preview button to test — you should see the Latch lock UI (a padlock icon and password field) in place of your gated content. Enter the wrong password and you'll see the error; enter the correct one and the content unlocks.
Congratulations — you've just placed your first Latch!
Your product content is now gated. Share the password with the customers, colleagues, or partners you want to grant access, and keep everything else out of sight.